Pages

Showing posts with label Recipes. Show all posts

Sunday, June 16, 2013

SHOOOOOOW POOOOOWWWWW!!!!

Or if you spell it correctly Sio Pao.

All my friends know the yumminess of sio pao. It is a very time consuming dish but the delicious results are worth it! JJ this is mainly for you. Nikki and Mei Mei can now make them without me so obviously I will no longer be needed. :-P


Filling:

5 pounds pork loin roast
water
1 onion
garlic salt
pepper

3 cups stock (liquid from the crock pot)
6 Tbsp Filipino soy sauce
3 Tbsp rice vinegar
2/3 cups light brown sugar
2 1/2 Tbsp cornstarch dissolved in 1/2 cup water
1 onion, minced usually ends up being a little more than a cup
4 tsp minced garlic
2-3 Tbsp cooking oil

The first part of this is real easy. Season the pork loin with salt and pepper and place in a crock pot. Cut the onion however you see fit, I like to cut mine in sixths. Cover the roast almost half way with water if you're over that's fine. Set the crock pot on Low for 8 hours. Shred it and discard the fat.

I went through a lot of pain staking tediousness to get the measurements for a friend, JJ. Every time I make sio pao I promise I'll get the measurements and then I forget. Like most of "grandma's" recipes the measurements are not exact, so I worked hard to get the measurements as close as possible. You may need to tweak it a little.

1) Heat a large skillet on medium heat and cook the garlic and onions until they are clear. DO NOT brown them because it changes the taste of the filling.

2) Add the shredded pork and heat through, this shouldn't take too long.

3) Add the stock, soy sauce, and vinegar and bring to a boil. Once it boils crumble the brown sugar on top and mix well.

4) Stir the cornstarch mixture before adding it to the pork. Mix thoroughly and bring to a boil until the liquid has thicken. You may need to add more or less depending on where you are at. I usually dissolve 5 Tbsp cornstarch in a cup of water and add until a little at a time until the sauce has thickened. Now let the meat cool because it will reabsorb the juice/liquid/sauce.

 Dough:

I have been asked by others if I can substitute things to make this gluten free, wheat free, egg free, sugar free, etc. You can't. I've tried making this several ways and it never comes out right. This is also a half recipe, very few people I know have a mixer big enough to make a full batch.

**** Before I start I usually heat my oven to 100 degrees Fahrenheit and then I turn it off. The result is a very warm draft free place to let my dough proof. My oven cools fairly quick if yours maintains heat warm it to about 85 degrees and shut it off*******

5 tsp dry yeast
2 1/2 cups warm water (105-110 degrees)
1/2 cup white sugar
3/4 cup Crisco or vegetable shortening
1/2 tsp salt
1 egg
5-10 cups of flour (It depends on humidity. When I made the first batch it took 6 cups but for my second batch I used almost 10.)

1) Dissolve the yeast with 2 1/2 cups of water and 1/2 cup sugar. Mix well and set aside until bubbley. I wish I had the forethought to take a photo before I added the Crisco.


2) Slowly mix in the Crisco, salt, and egg on low. Using a dough hook gradually add the flour a cup at a time until the dough is no longer sticky and starts to form a ball.

3) Divide the dough into 2 parts and place them in large bowls draped with a damp paper towel. Let them proof for 30 minutes in a warm draft free area.

From there I punch down the dough and lightly roll it around while still inside the bowl. I really don't want to over work it.

Measure about 1/4 cup of dough and roll it into a ball in your hands. It may be sticky at first but once you've worked it, it should no longer be sticky.

Stretch out the dough, leaving the middle part thicker than the outer edges.

Spoon the meat mixture onto the middle of the dough. I can get a little more than 1/3 cup and still close it. Start off with less if you are not familiar with making steamed buns, about 2 1/2 Tbsp and work your way up.

Fold the edges over and pinch to seal. Once it is sealed roll the dough in your hands to reform a ball. Don't be to forceful or the filling will come out.

Place the bun on a cupcake liner and set on a plate, tray, or another area. You can let them proof if you'd like but I place mine in the steamer when I'm done with them and cook them. Steam the buns for 18 minutes they will poof up. Now do not be upset if they are pretty and round and poofy and when you move them they deflate and look yucky. It happens from the drastic change in temp and it depends if the steamer has too much water condensation. It will still taste great.


Here is a super sized sio pao for one of my boys! Love this kid he is like a little brother and he is so funny, too!!!

He didn't know how to smile because he took too big of a bite!


Good luck and don't be afraid to ask any questions! I'm still looking for feed back about a give away. Leave a comment if you are interested in free bento stuff.

Monday, May 6, 2013

Apologies

So my many viewers   For my faithful few viewers I would like to apologize for not posting in quite sometime. Shortly after my last post we received orders to move to Japan. Not knowing how long it would be before I could see my family again, we decided to take a trip to visit my mommy, daddy, and the rest of my large family. We enjoyed the beach, rock Disneyland until my children passed out on Main Street, ate as much Mexican food as humanly possible, and made some AWESOME memories. For anyone who has moved with the military knows the process varies from company to company. Since we were on recruiting and not located on or near a base this was an annoying, difficult, pain staking, educational experience. We have been in Japan since January and in our house since February. Our stuff arrived in March and we have been slowing unpacking. Taking all of this into account our lives have been a little upside down. So to make it up to you, I am posting pictures of the lunches I have made out here and a recipe for broccoli beef my neighbor shared with me. I tweaked it a little... Her recipe called for what I thought was a lot of wine.
I have two versions of this recipe. One recipe has to marinade overnight and the other just needs to marinade for a couple of hours.
Overnight marinade: 
4 tsp cooking oil
4 Tbsp of Japanese soy sauce 
2 Tbsp of dry white wine or sake 
1-4 tsp sugar or more. Taste after each tsp to make sure it isn't to sour. Depending on the wine or sake it may be a little sour.  
Couple of hours marinade:
4 tsp cooking oil
4 Tbsp of Japanese soy sauce 
2 Tbsp of lemon juice or any other acidic juice 
1-4 tsp sugar or more. Taste before adding the meat if it is really sour add some more sugar. 


The differences between marinades is lemon juice or any other acidic juices will cause the meat to become tough after a couple of hours. I don't like using the white wine because I don't use the bottle before it goes bad. If you like wine or plan to make a variety of recipes using white wine it may work for you. Being overseas I can't find small bottles of wine.

The remaining ingredients are

2 tsp cornstarch
4 Tbsp oyster sauce
 2 Tbsp cooking sake or cooking wine

4 tsp cooking oil
4 tsp garlic
2 tsp ginger

3/4 lb flank steak
As much broccoli as you would like we use about 1 1/2 lbs


1) Cut the flank steak diagonally against the grain about 1/2 inch thick.

2) Mix all the marinade ingredients together and place in a glass or plastic dish. Add the sliced meat and toss. Cover and marinade overnight or for 2 hours. Take out of the refrigerator and mix with cornstarch. Let the mixture rest on the counter while you finish the next steps. 

3) My preferred method to bring a small amount of water to boil and steam the broccoli. If you prefer to blanch the broccoli then you may do so. Here in our house we prefer crunchy broccoli. My neighbor likes it  noodle limp. Cut broccoli florets and place aside while the water heats up.  Cook according to your preference and set aside. 

4) Mince the garlic and ginger. I grate the ginger using a ginger grater like this one.


5)  Heat a skillet or wok with cooking oil. Stir fry the garlic and ginger for 45 seconds before adding the sliced beef, stirring frequently until just cooked. I like mine medium well. 

6) Turn off the heat and quickly mix in the oyster sauce and cooking sake. Toss in the broccoli and you're done. It is a really easy recipe that as become a regular dish in our house. I like the version with lemon juice better. You will have to taste the marinade before you add the meat. I have had some lemons that weren't too sour and 4 tsp of sugar was too much. Other times I've had lemons so sour it strips the enamel off my teeth. For my foodie friends you'll notice this isn't flank steak. My HD bought the wrong one and I didn't notice until I went to make dinner. 


Friday, December 16, 2011

Gifts for teachers.


So I was asked if I give gifts to my daughter's teachers. I thought it was an odd question since I thought everyone did. I have come to find out from several people and teachers I know personally that many do not give gifts of any kind to their kids' teachers. So I have put together some of the gifts I will be delivering tomorrow morning. For the most part I make baskets with school supplies, since that is what my mom and I did when I was little. I didn't take any pictures since the cellophane is already on them and it is hard to see what is inside. So for some of the administration and the other teacher aides I made coffee mugs with three chocolate covered spoons, coffee, and hot chocolate on some I have Coffee Mate. if you shop around right you can make these cups for as cheap as $2.35 but like I said you have to shop around right. As you can see in the background there are two of the baskets I made. Once again if you shop around right you can make a really nice basket for $5.00 to $6.00. So I know you are dying to know how I made those really yummy looking spoons, right? Forget it I'm not telling :D :D :D :D


Okay now I feel bad. So here is what you'll need:

1 cup milk chocolate chips
1/2 cup each white and semi-sweet chocolate chips
2 tsp vegetable shortening
double boiler
cookie sheet
parchment paper
toppings if desired

I like to use the double boiler method. This method is when you have one pot filled with water and place a bowl or another pot on top so that the hot water will heat the second pot. Some like to nuke it but I don't like that method. If you would like to use your microwave just nuke the chocolate and shortening in a microwave safe container in 30 second intervals at 50% power. So all you do is place the chocolate on the top pot/bowl and stir until it is melted. I really do not like to turn the heat up too much because chocolate can ruin very easily. After the chocolate is smooth dip your spoons into it and place on a cookie sheet that is lined with parchment paper now you can top with crushed peppermint, butterscotch, marshmallows, bits of caramel, anything you want really. Now let them set for 6 hours or so until the chocolate as solidified. Ta-day super easy gifts!!!

Sunday, November 13, 2011

Chicken of Garliciness!!!

So this is my all time favorite recipe to make on those days that I am going to be busy. A stay at home mom that is busy. Phsst. I'll believe it when I see it. It is so super easy and I keep all the ingredients on hand for those occasions when I won't be in the house, busy with chores, or just plain lazy. Today I was just too busy to be in the kitchen all day so I made our chicken dish. I've made this for potlucks, other gatherings and to use the leftovers in many different dishes. So here we go:

Like most people say simplicity is the key to any great dish and this dish couldn't be simpler. You'll need

3-3 1/2 pounds of chicken (I prefer legs and thighs which you can cook longer. If I use white meat I change the cooking time to 5 hours.)
1/4 cup of extra virgin olive oil
2 TBSP plus 1 tsp paprika
1 TBSP kosher salt
1 1/2 TBSP black ground pepper
1 large onion sliced
20-30 cloves of garlic with the skins on


1) Slice the onion and line the crock pot, like this. Now depending on the size of the onion you may need two.  For some reason lining it ensures the meat doesn't get over cooked.


2) Mix together the spices and the EVOO to make a paste. Mine was a little thin this time but it was still pretty thick. Next you need to coat the chicken in the seasoning paste. It really doesn't matter how you coat it as long as its coated. I like to layer the chicken and the paste alternately in a bag and then shake to coat, which every is your preferred method. After the chicken is coated place it in the crock pot.

3) Separate the cloves from the bulb, be very careful not to rip the skins on the cloves. I like to wash them after separating them.


  4) Now spread the garlic over the chicken, cover and set on low for 6-8 hours. Ta-dah! That's it. It truly is a very simple recipe. 


Now I served this with mashed potatoes and broccoli and cheese tonight but tomorrow I might turn the leftovers into nachos, burritos, chicken sandwiches, salad, really almost anything. I hope you'll enjoy this recipe. This is Ronnie, signing off. 


Friday, September 30, 2011

Creamy cheesey cheesey cream potato-y goodness!

Nikki and Brandon (my lovely former tea boy) I have finally posted my potato and cheese soup.I know you are dieing from total shock! Call 911 to resuscitate you then make this soup! Bruce I have made this soup with a vegetable stock made from:
3 carrots
4 stalks celery
3 cloves of garlic
2 onions quartered
2 bay leaves
2 sprigs of thyme
1 rosemary
and water of course

I also used vegan "cheddar cheese" and it tasted about the same. I know I probably don't have to tell you this since you have been meat free for years but this is what I used for a vegan friend (Holy cow Ronnie cooks Vegans!!! Run Veggie lovers! RUN!!!) and it tasted almost the same (OH MY GOSH!!! Ronnie thinks people taste like potatoes!!!).

So here is what you'll need:


2.5 lbs potatoes cut in 1x1 inch cubes you to measure or the soup will turn on you and run away
1 1/2 cup milk
8 oz cheese (I use 6 oz of medium cheddar and 2 oz of sharp. The leftover of medium I use to garnish)
2 tsp thyme leaves
2 bay leaves
1 cup onion, sliced
1 tbsp garlic, sliced
1/2 cup flour
4 tbsp Extra Virgin Olive Oil
48 oz chicken stock or vegetable stock

So what do we do?

1) Heat the EVOO in a pot over medium high heat. Once the oil is hot add onions and garlic and sweat them. Do not try to brown them it makes the soup taste burnt. Well let me rephrase that, every time I brown the onions and garlic it has a burnt taste to me. You can try if you like. Back to sweating. Sweating, as I understand it, is to cook the vegetables until they are transparent or limp and liquid is released. (Now that was an intelligent answer, considering)


Before sweating

After sauna sweating

2) Next add the 1/2 cup flour and mix.Yes, it will look like a lumpy, clumpy, sticky monster that wants to destroy the world. Trust me it will be okay.


3) Add the stock and mix very well; make sure to scrape the bottom.


See it will look like this. Yummy cloud soup. That's it you're done. Wait we are only on step 3? Oh onto step 4.

4) Now it is time to make it look like a pond. You know the type with little leaves and nefarious floating things? So add the potatoes, thyme and bay leaves. Mix the pond and bring to a boil, not the type that is going to explode all over your kitchen but the nice type that has little bubbles. Cover the pot and after 2 or 3 minutes then lower the heat to lowish. 

See it looks like a pond.

5) Simmer for 25 minutes. I usually check the potatoes at 15 minutes and then make a judgment call based on the doneness readyness softness of the potatoes.

6) My favorite part! Take the bay leaves out of the soup. Why? I really don't know. I just know we do. Google it. Take your device of soupyness and blend the lumps out!!!! BWHAHAHAHA! Sorry about that. Let me explain when I had a glass blender I would use my blender, when I had a food processor that didn't have this weird spout on the side I used it. Sadly both are in appliance heaven. So I now have a blend wand which is the technical term. So just blend away however you see fit. Oh and if silky, creamy soup if not something you enjoy you can use a potato masher for a clumpier heartier version. If you decide to go with the masher I suggest mincing the garlic and onions instead of slicing.

Blendy goodness

7) Add cheese (yes I have a photo) and the milk then mix until cheese is melted and milk is incorporated.

8) Spoon that sucker into some bowls and garnish with some cheese. DO IT! CHEESE IT!!!!


Honey cornbread of deliciousness. Yummers!

9) Enjoy!!! This is for my baby, Marikia! Don't be mean to Mommy and she'll feed you this. If not Auntie Ronnie with rescue you from the mean Mommy and feed you yum yums! Loves yous Nikkis!!!!

Friday, June 3, 2011

National Doughnut Day!!!!

Holy disks of fatty deliciousness! I did not know that today was National Doughnut Day. Imagine that.... So I was in the front yard letting the girls play in the sprinkler when a "neighbor" walked by. (I have no idea if it was a neighbor or not. I have never seen them before and she was walking a boy, possibly her son, to the park just past our house.) The girls dragged asked if the boy wanted to play too. As the kids played we mommies talked. Somehow Lily (baby #1) offered the boy pretend beignets which she had seen in Disney's The Princess and the Frog. As we talked more she told me about a recipe for beignets. Since it is National Doughnut Day why not try them.

A little background:  Beignets are French in origin that is loosely used for a deep fried pastry with fruit filling (I think we Americans put our own twist on it down in the Melting Pot known as Louisiana).

Recipe:

1/2 cup butter
1 cup water
1 tsp sugar
1/4 tsp salt
1 1/4 cups cake flour
4 eggs
1 tsp of vanilla
Oil  which should be heated to 350 degrees Fahrenheit
A lot of powdered sugar


 You will need a sauce pot, measuring cups and spoons, a sifter (I do not own one so a sieve it must be), a spoon to mix wooden/plastic, and a pot to fry the beignets in or in my case a deep fryer.

 In one sauce pot you need to add the butter, water, salt and sugar and bring to a soft boil. I wish I had a picture of that but I don't sorry. Once the mixture as come to a boil, remove the pot from the stove and add the flour. It will clump like this. Do not fear the clump!
 Next you need to add one egg at a time and mix thoroughly. For some reason it was still clumpy.....
 After you add all 4 eggs the mixture will be sticky and clumpy but that large scary clump will be just a bunch of little ones. I tried very hard to remove the lumps but I failed. So maybe it is suppose to be lumpy.
 Drop spoonfuls of dough into the preheated fryer. It literally took 1 minute for the beignets to float to the top and turn golden brown.
 Flip beignets so the other side can continue cooking. Once again it took less then one minute.
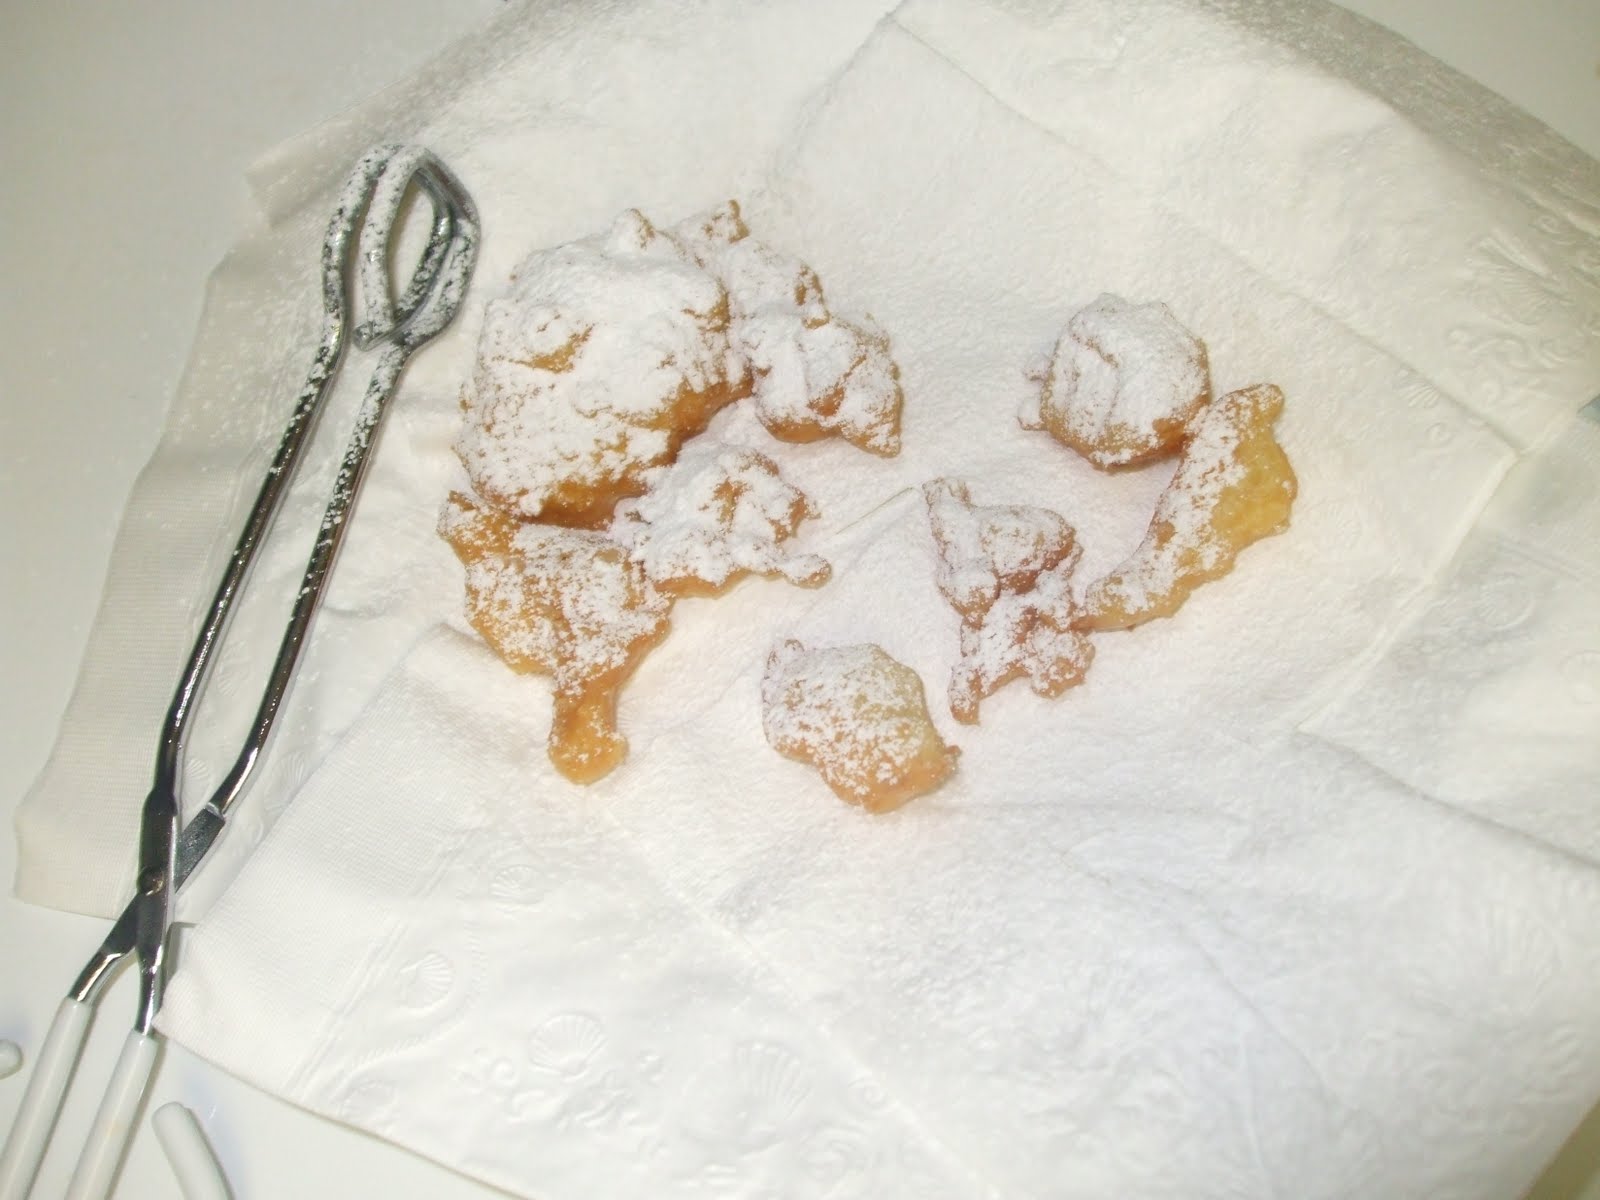
 Sprinkle with a ton of powdered sugar. Ta-dah! Beignets!


What did I think?

Let me prep this with I have NEVER had a beignet before and had no idea what it should taste like. Since my "neighbor" said it was like a doughnut I was thinking Krispy Kreme or doughnuts in general. Well the insides were a little eggy (yes I know that is not a real word). I turned up the heat to 375 degrees and cook them for a couple of minutes on each side. This did not change anything. The beignets were still egg-like and tasted vaguely like a funnel cake but not as yummy. I would have to say this recipe was a failure..... I know what will happen though, the same thing that happens every night Pinky I always do with a recipe I don't like. I'll fiddle with it until I like it. I will say the girls thought it was yummy and enjoyed pretending to be Princesses serving beignets. If any of you have had a beignet is this what they are suppose to be like? *sigh* This weekend will be Sio Poa which I KNOW how to make and have a time tested recipe that is delicious.